It is thought that approximately 30% of UK households have no access to off-street parking and although my family and I are not amongst this number, I was recently reminded of what a limitation it is to be forced to park a great distance from your front door, on a trip to Center Parcs.
You see, after our journey there, with our two kids munching on snacks the entire way, our car was in quite a state and once the car was unloaded, I really wanted to give it a vacuum before it was once again loaded up again in a few days time, for the journey back. However, the James Vacuum that I found in the storage room only had a 10m long cable and if you have ever been to Center Parcs, you know that you park quite a distance from the lodges. It was then that I considered the idea of getting a cordless vacuum cleaner that wasn’t terribly under-powered and fiddly.

Having previously reviewed a few of the vacuum cleaners from the
- Useful if you have no access to mains power
- Good for people with mobility issues
- It is double the price of the standard Henry
- The battery lasts just 20 minutes
If you are one of the unlucky people that have no access to your car with an extension cord, or if you worry about tripping over a lead, then the
James Cook - Product Tester at The Henry Range
Is the Henry Cordless the right fit for you?
The
This is not a fancy vacuum cleaner but it is powerful and it has the convenience of being cordless, so if you have no access to off-street parking or you want to be able to vacuum your shed, attic or other place with no access to power, this is a great choice. Additionally, if you just like the idea of not tripping over a cord as you vacuum around your home, then read on.
Unboxing and Assembling
In the box you will find all of the regular attachments that come with the
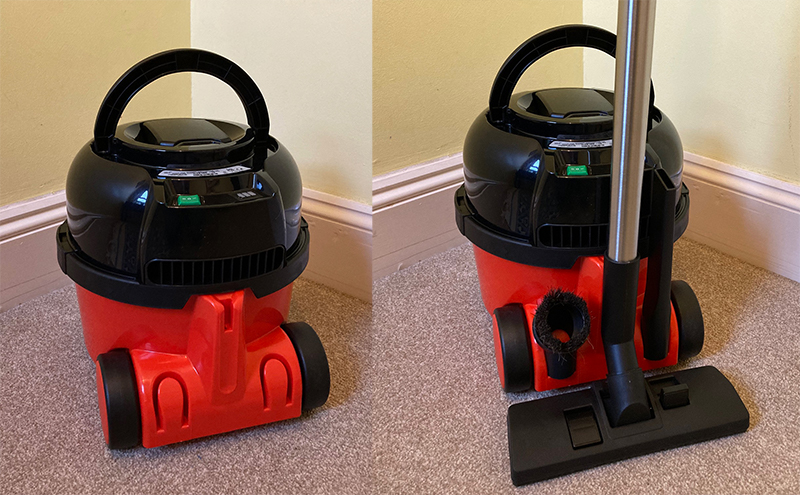
All I had to do was connect the three extension tubes together and then attach one end of the hose to the tube handle. The other end needed to be screwed onto the nose of
There was already an additional dust bag pre-loaded inside so in just a few minutes everything was assembled and I was ready to start using it. All in all, it was effortless and I didn’t even look at the instruction manual!
How does Henry Cordless differ from Henry ?
Apart from the obvious fact that the
Battery Life and Charging
The battery in the
Unfortunately, all lithium batteries will degrade over time, so the fact that
There is a battery indicator light that shows you how much charge it has, on top of the
The setting that you choose to run the
The battery takes 3.5 hours to charge fully, so you need to either plan ahead or purchase a second battery, to ensure that you are always ready to vacuum. The batteries are not cheap however.
Storage
The
At the rear of the
Dust Capacity
The
On the side of the machine are two clips which, upon releasing outwards, allow you to lift off the top of the
Manoeuvrability
The
Performance
Prior to purchasing the
Carpets
For this test, I used a mixture of lint from the tumble dryer filter, as well as dust and debris that was already in my
Carpet Cleaning Before and After (1 stroke up and 1 stroke down)
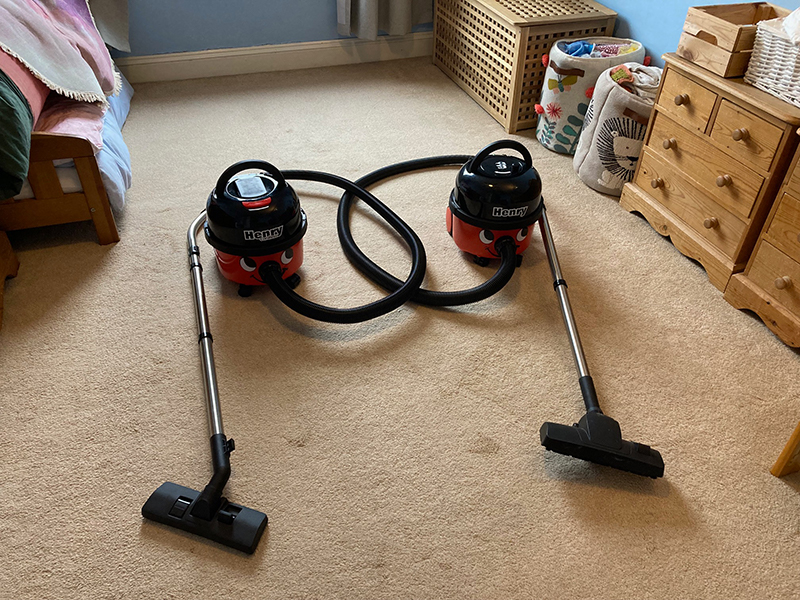
The Henry Cordless is on the left and the original
So which one came out on top in terms of carpet cleaning performance? I have to say that I did not see any difference between the two. The
Hard Floors
Moving on to the hard tile floor in my bathroom, I used the same detritus. Once again, Henry Cordless is on the left and the original
Hard Floor Cleaning Before and After (1 stroke up and 1 stroke down)
Once again, performance was very similar between these two on hard floors but if you look closely at the floor just above the floor tool for the
Once thing I did notice is that this combi floor tool seems to be better suited for carpets, as it tended to push some of the dirt along instead of suck it up on the hard floor test. I found that I had to tilt the head slightly to create a larger gap between the head and the floor.
Attachments and What they Do
Combi Floor Tool
Speaking of the comi floor tool, this is the main attachment that you are going to want to use for 90% of your vacuuming with the
Brush Bar (Up vs Down)
I found the combi floor tool to be very versatile for both hard and soft floors. As already mentioned, I did find myself having to lift or tilt the head upwards on hard floors, and for when large debris wasn’t quite getting underneath the head on carpets, but it wasn’t much of a hindrance. The plastic it is made from feels hard and strong and the brush bar did collect quite a bit of hair from my carpets (which I picked off with my fingers and let the suction take it down the hose).
Reach
Now if you are anything like me, you neglect the carpets and floors underneath your beds, due to the fact that it is often quite hard reaching the whole way underneath and it can be quite an arduous vacuuming task. I really wanted to see how well the
In terms of reach, I was able to get as far as 1/3 of the way to the other side of our double bed, which I thought was pretty good. For the remaining distance, I switched out the floor tool for the upholstery brush (more on that attachment below), so finish vacuuming the carpet.
Upholstery Brush
The upholstery brush is essentially a micro version of the combi floor tool, with a brush bar that you can slide on and off, depending on whether you are tackling hard or soft floors.
The upholstery tool is for vacuuming stair treads, sofas, chairs, car seats and anything that is flat but too small to use the combi floor tool on. I was particularly impressed with the results I got on our stairs, with the brush bar attached.
Upholstery Brush Before and After (Multiple Strokes)
I was able to get some really good results on the stairs with the upholstery brush but it did take quite a few strokes back and forth. I did notice that the really large debris tended to get stuck around the hole, which I picked out and sent on its way back down in smaller clumps. However, for everyday smaller dust and dirt, I don’t think this will be an issue.
Soft Dusting Brush
The soft dusting brush is circular and small, with some very fine bristles around its circumference that are meant to gently agitate dust on delicate items in your home, such as picture frames, ceiling fans and any other delicate surfaces where attachments with harder bristles could cause damage. You can use this attachment to quickly vacuum in and around all of your knick knacks on your mantle piece or shelves, for example, without fear of any breakages.
Soft Dusting Brush Before and After (Multiple Strokes)
Crevice Tool
The crevice tool is not the attachment that I used the most during this review but it is the one that I most enjoyed using. It is long and cylindrical in shape, with a very narrow opening, and it is ideal for getting into those really tight gaps down the side of sofas, as well as the tight spots that are usually missed by the larger combi floor tool, such as the gap between your floors and skirting boards. There is a lot more noise produced when the crevice tool is attached, so it is not one to use next door to your sleeping baby.
Crevice Tool Before and After (1 Stroke)
Car Cleaning with Henry Cordless
I was really curious to see how well the
Initially, It was great not having to find an extension lead, although my drive is quite small so I technically could manage without one. However, if you had to carry this machine some distance to your car, it would not be much of a struggle because you have no need for the heavy metal extension wand, so you only have to carry the machine itself, plus the three attachments you are going to want to use (upholstery brush, crevice tool and soft dusting brush).
I found that the upholstery brush was the attachment I used on the floors and mats, as well as in the boot. The thick, hard bristles did a good job of agitating the dried mud.
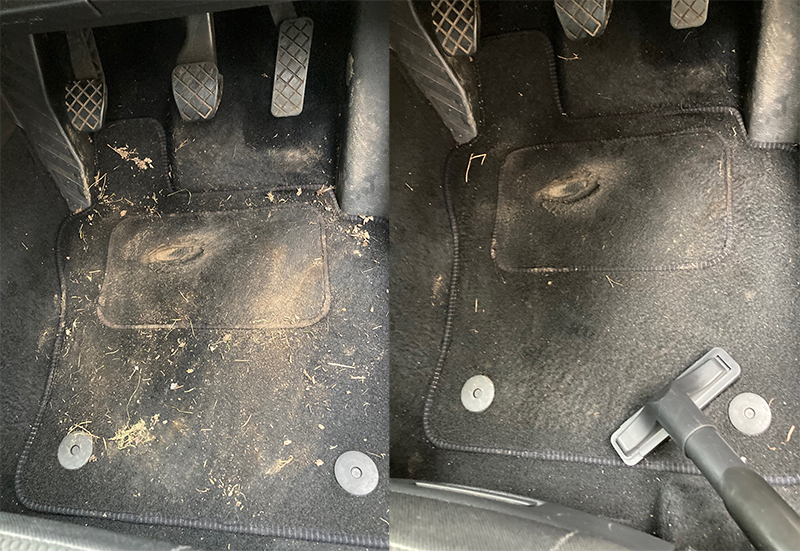
Car Mat Cleaning with the Upholstery Brush Before and After (Brushing for 1 Minute)
I was pleased with the results. It did take a fair bit of elbow grease and the suction power wasn’t enough to lift up some small stones that were left remaining, but all in all the bristles did a great job and I got some impressive results in a short amount of time.
Next up was the soft dusting brush, which I found to be perfect for the air vents and the rest of the dashboard, including around the stereo knobs, cup holders and gear stick. Additionally, I used this attachment for our children’s car seats in the back and the results were really good.
Lastly, the crevice tool was perfect for reaching the incredibly tight gap between the car seats and the doors, as well as the center console. The suction power of the
Stair Cleaning
Henry Cordless, or any other
Secondly, the weight of this machine (albeit lighter than the corded
One way of getting around this is to leave the machine at the bottom of your stairs and then attach one of the attachments to the end of the extension hose. However, this still didn’t reach the top of our staircase.
Did you find this content useful? If you have time, your review on Facebook would really help us out!
Our Verdict
The
However, are the benefits of not having a cord worth the price tag? Remember, this machine is almost twice the cost of the corded
Overall though, I was impressed with this battery powered cordless vacuum cleaner. I was expecting the suction power to be underwhelming but that was simply not the case. It is sturdy and tough with well thought out attachments that are likely to last just as long as everything that Numatic makes.
Where to buy Henry Cordless
- Review of the Henry Wash Carpet Cleaner - March 17, 2025
- Henry Quick Review - January 13, 2025
- The Henry Vacuum Range – What are the Differences in 2025? - January 5, 2025


